> For the complete documentation index, see [llms.txt](https://docs.optis.me/llms.txt). Markdown versions of documentation pages are available by appending `.md` to page URLs; this page is available as [Markdown](https://docs.optis.me/swatch/variant-display/auto-assign-color-swatch.md).
# Auto-assign swatch
### **Function**
Setting a color for every variant value one by one can take a while, especially with options like *Black*, *Dawn*, *Lavender,*… **Auto-assign swatch** does this for you with a single click — it looks at each value and fills in a matching color automatically.
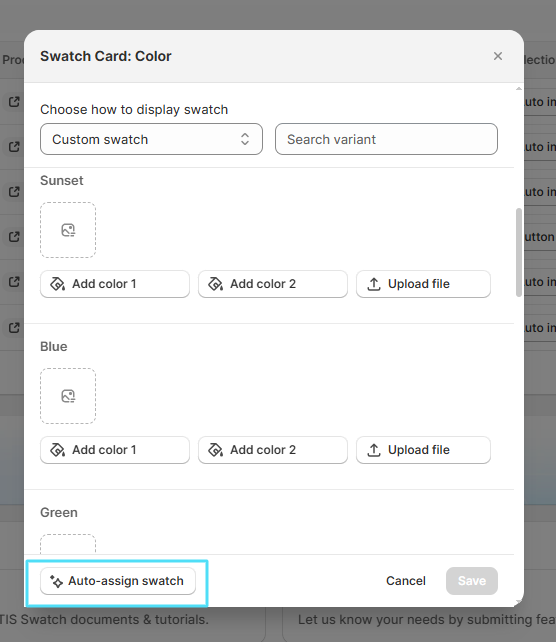
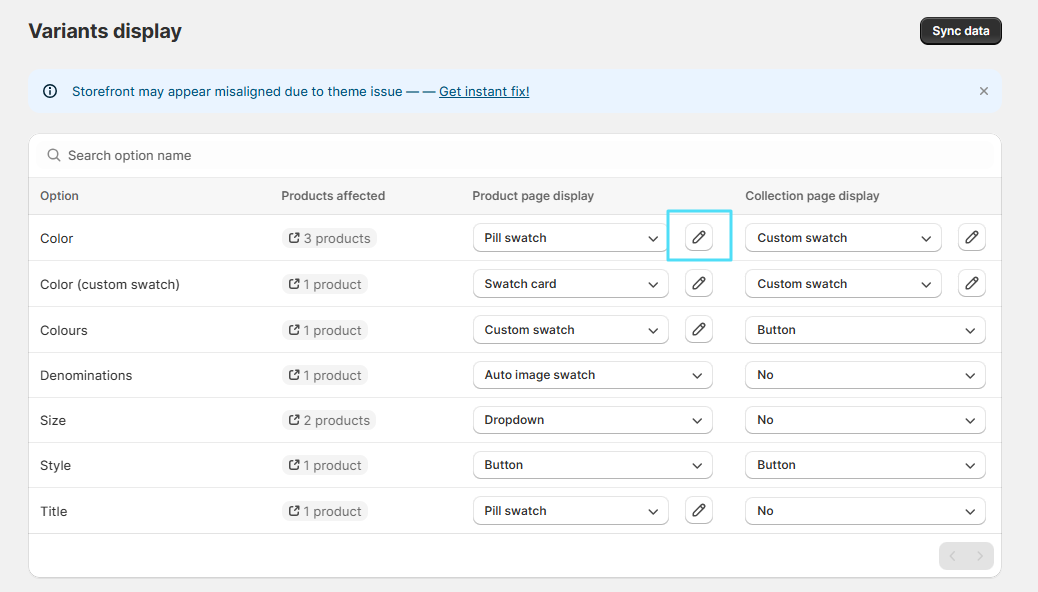
You'll find this button in the **Custom swatch editor**, no matter which display type you're using — **Custom swatch**, **Swatch card**, **Pill swatch**.
### **How it picks a color**
The app checks each value against **3 sources**, trying them in order until one works:
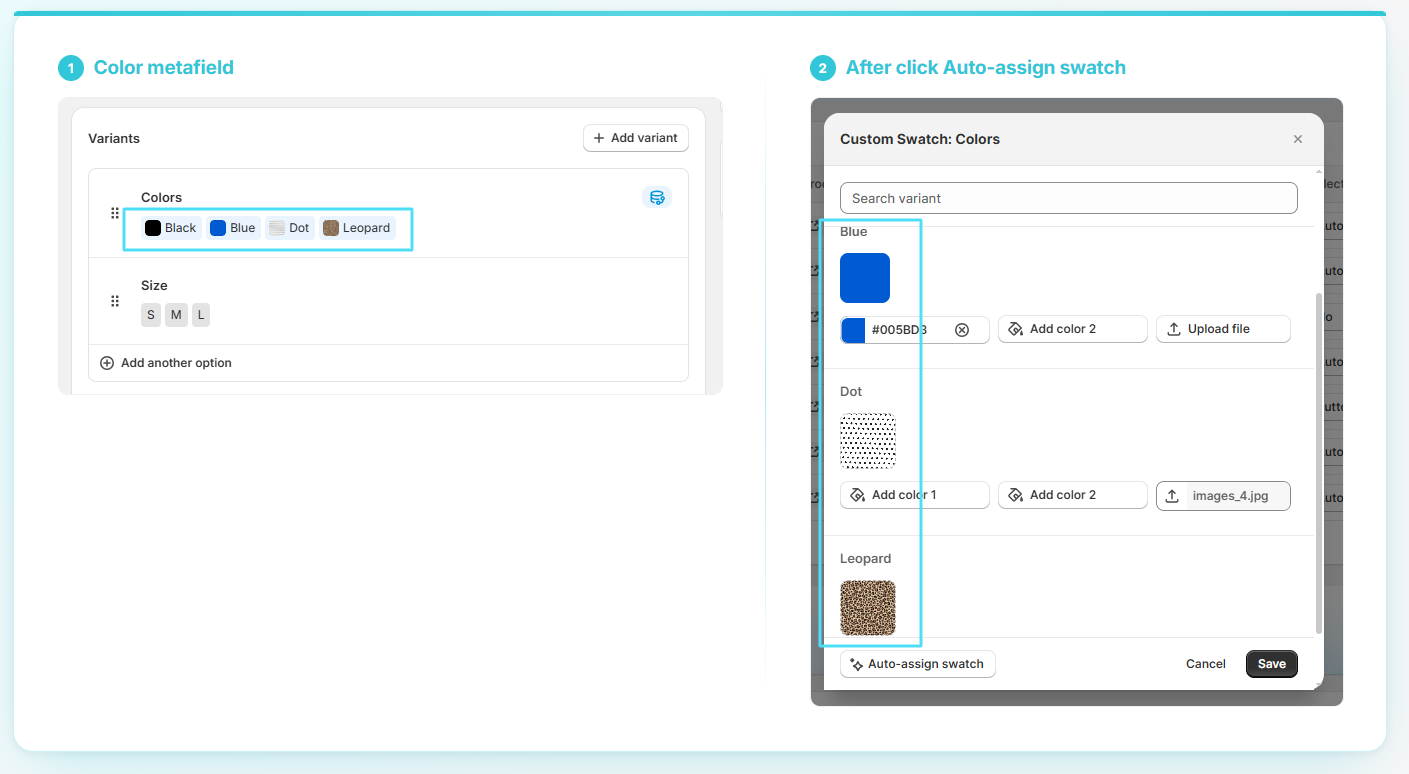
1. **Color taxonomy metafield** — if your product uses Shopify's standardized Color taxonomy, the app reads the exact color defined there. This is the most reliable source, since the color was deliberately set, not guessed.
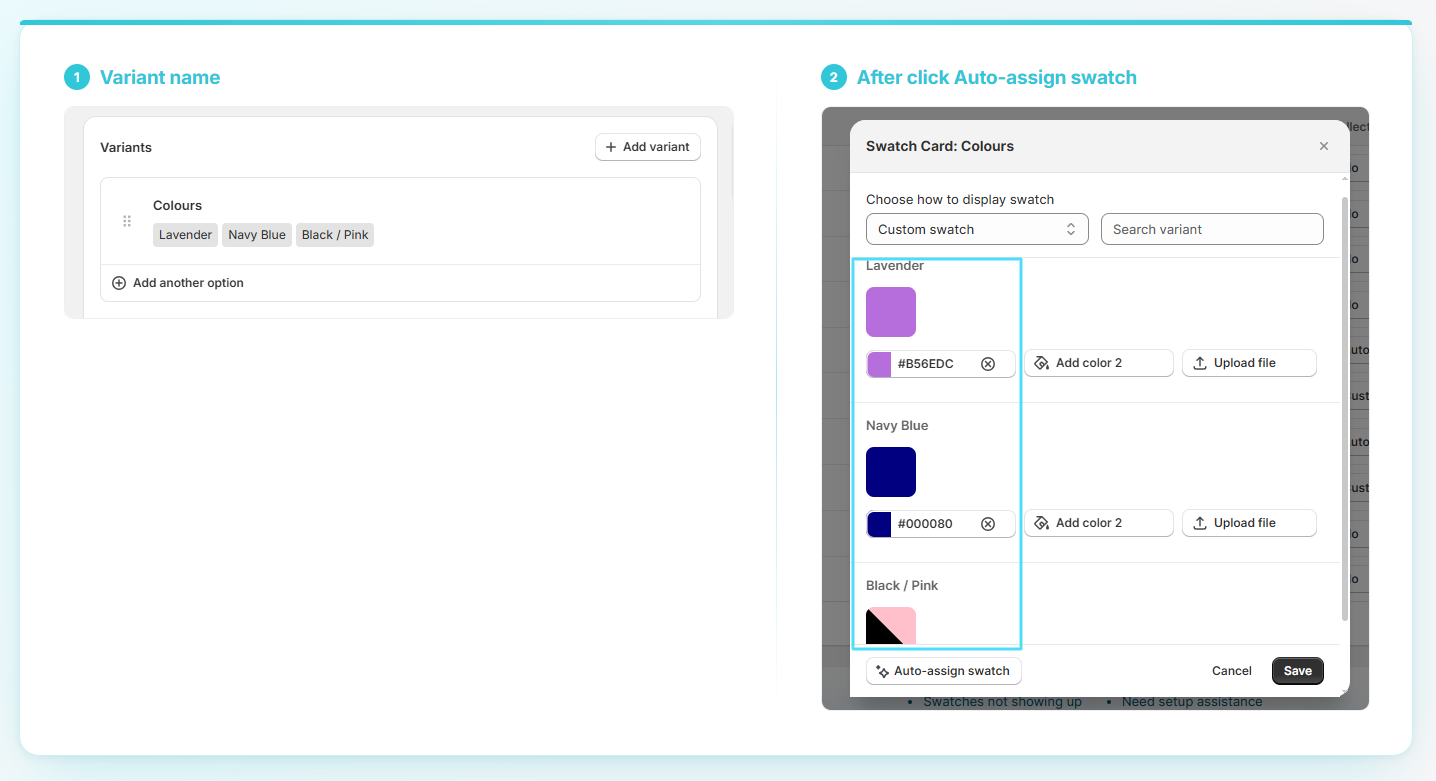
2. **Value name** — if there's no taxonomy color, the app tries to recognize a color from the name itself
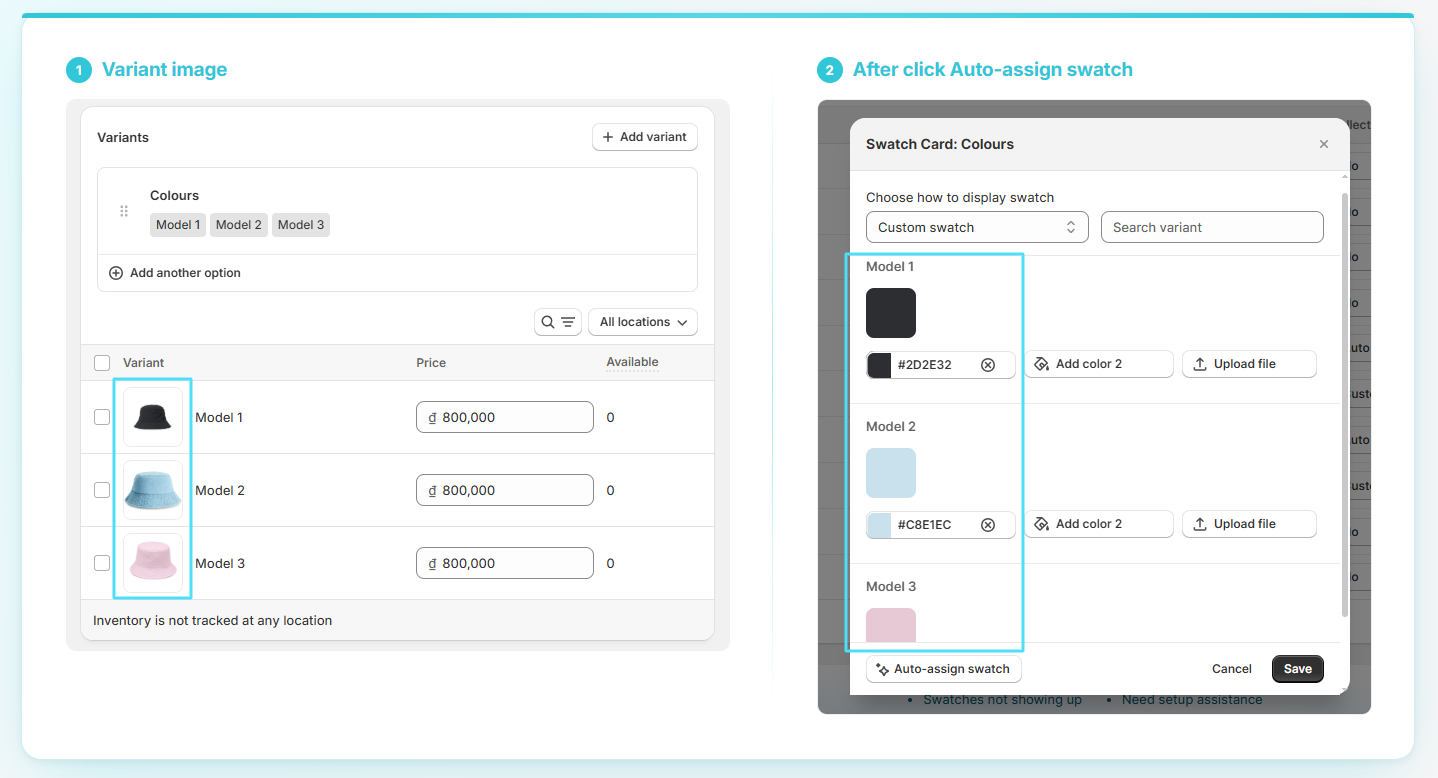
3. **Variant image** — if the name doesn't give a clear answer either, the app looks at the variant's image. If that value already has its own swatch image set in Shopify, the app uses that image directly as the swatch; otherwise it extracts the dominant color from the variant's photo.
If a value can't be matched through any of these, it's simply **left blank** for you to fill in by hand.
### **Use when**
* You have a color option with **many values** and don't want to set them one at a time.
* Some of your products use Shopify's **Color taxonomy**, and you want those colors to carry over automatically instead of re-entering them.
* You just want a quick starting point — you can always fine-tune individual colors afterward.
### **How to use it**
{% stepper %}
{% step %}
#### Open the swatch editor for your color option
{% endstep %}
{% step %}
#### Click **Auto-assign swatch**
It's the button in the bottom-left corner of the modal. The app goes through every value and fills in a color where it can.
{% endstep %}
{% step %}
#### Check the result and adjust if needed
Any value left blank means the app couldn't confidently detect a color — set it manually using **Add color**. You're also free to change any auto-filled color; it won't be overwritten unless you run Auto-assign again.
{% endstep %}
{% step %}
#### Click **Save**
{% endstep %}
{% endstepper %}
{% hint style="info" %}
**Note:** If a value **already has a color or image set**, Auto-assign leaves it as is — it never overrides an existing swatch, so it's safe to run anytime without losing your manual work.
{% endhint %}