For the complete documentation index, see llms.txt. This page is also available as Markdown.

Variant badges

Variant badges let you pin a small label directly on a swatch — things like New, Hot, Limited, or Best seller — so shoppers notice key variants at a glance without having to read through a product description.


Badge types

There are two types of badges:

Type
How it works

Manual

You assign the badge to specific variant values yourself. It shows on those values regardless of stock status.

Auto · Sold out

You assign the badge to specific values and it only appears when those variants go out of stock. When they're back in stock, the badge disappears automatically.

For a store-wide out-of-stock label that applies to every variant without any manual assignment, see Auto sold-out badge under Global Settings


How it works

  • A badge starts as a preset — design how it looks once, then assign it to as many values as you want.

  • Each value can show one badge at a time.

  • Updating a preset (text, color, position, shape) instantly updates everywhere it's assigned.

  • Deleting a badge removes it from every value it was assigned to.

  • Badges display on every variant display type: swatch, button, dropdown.


Create a badge

1

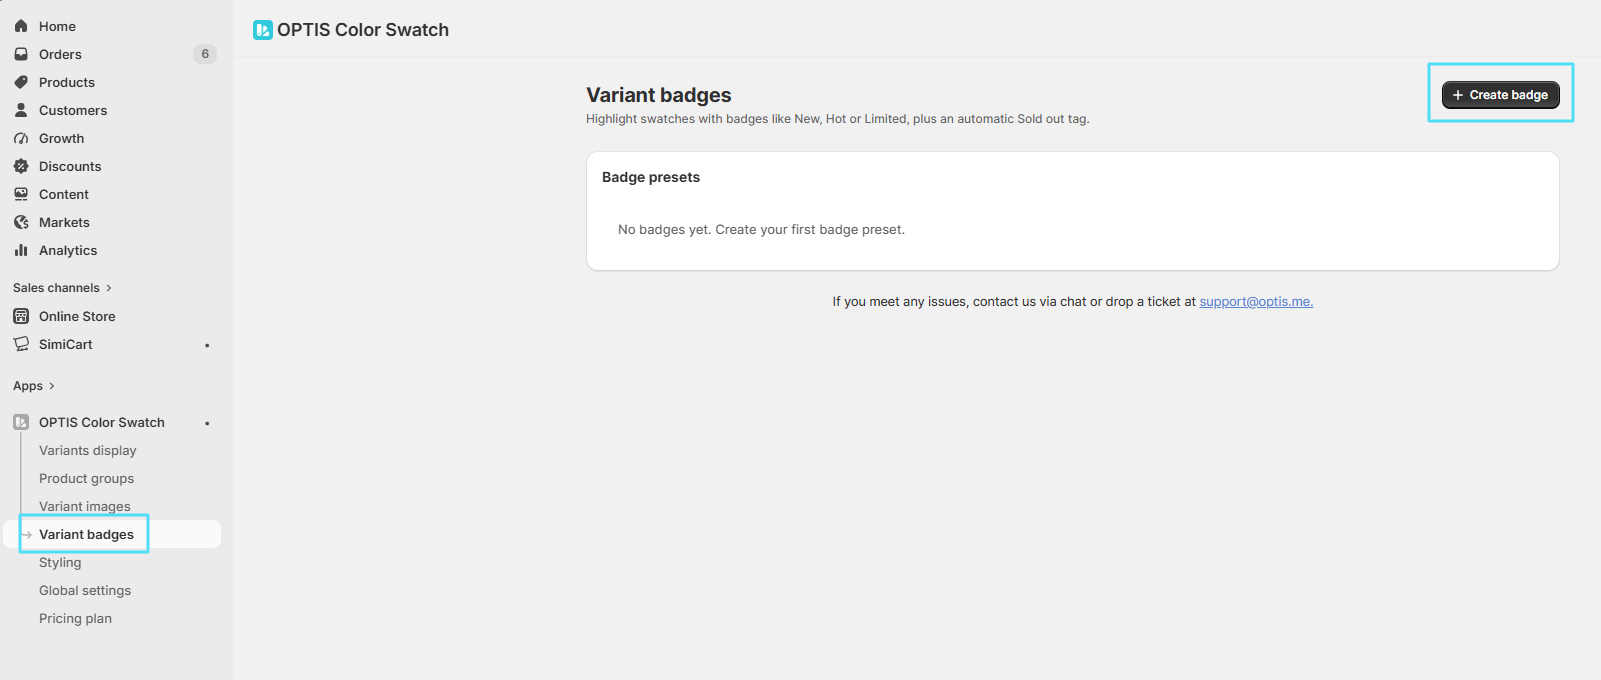
Go to Variant badges → click + Create badge

2

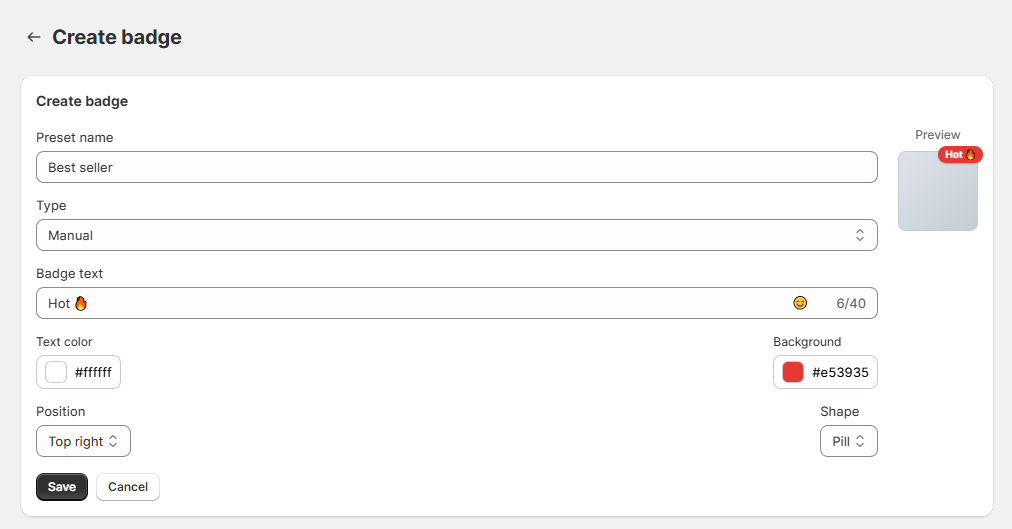
Fill in the badge details

Field
Description

Preset name

An internal label for you to recognize this badge in the list. Shoppers don't see it.

Type

Manual — always shows on assigned values. Auto · Sold out — only shows when the assigned variant is out of stock.

Badge text

The text shoppers see on the swatch (up to 40 characters). Click the emoji icon to add an emoji.

Text color

Foreground/text color of the badge (hex code).

Background

Background color of the badge (hex code).

Position

Where on the swatch the badge appears: Top left, Top right, Bottom left, or Bottom right.

Shape

Pill, Rectangle, or Corner ribbon.

The Preview panel on the right updates live as you type.

3

Click Save

You'll be taken to the badge's edit page, where the Assign to swatches section becomes active.


Assign a badge to swatches

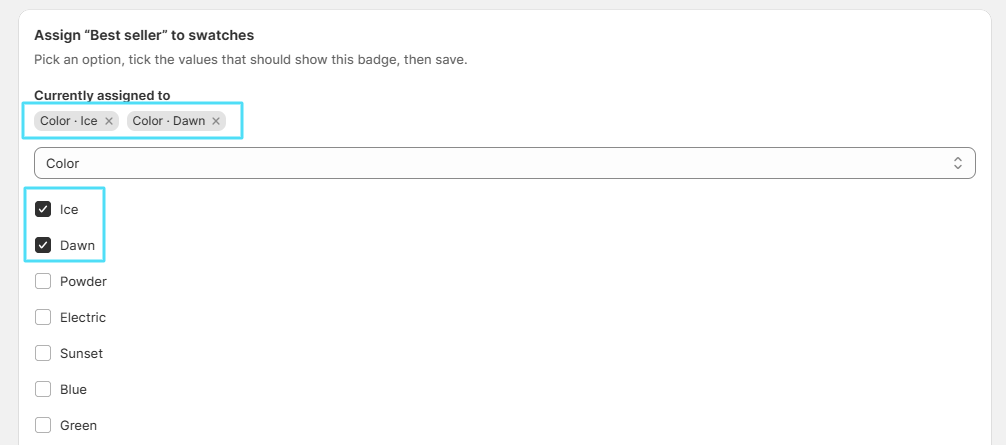
After saving, the Assign to swatches section appears below the badge form.

1

Pick the option from the dropdown

2

Check the values that should show this badge

The values already assigned to this badge are shown under Currently assigned to. Tick or untick individual values — changes save automatically.

3

Click Save assignment to save the changes

Note: A value can only hold one badge at a time. If you assign a second badge to a value that already has one, the previous badge is replaced.

Last updated